As disused in my previous article "Unity Game Engine's Mesh Renderer, Mesh Filter, Shaders and Materials Overview" a 3D scene is defined by a collection of vertices that include attributes such as position, normals, texture values, etc. For a device to display a 3D animation scene, the scene is transformed into a 2D image through the rendering process (aka the rendering pipeline or graphics pipeline).
This articles discusses the Open Graphics Library specification for Embedded Systems (OpenGL ES) used to define shaders and other elements to render 3D scenes. It also discusses the OpenGL Shading Language specification. And it provides an overview of a simple Android application that uses the OpenGL ES to render animated graphics on Android devices.
OpenGL ES and the OpenGL® Shading Language
For a 3D scene to display there are a series of steps executed through the rendering pipeline. These steps ensure 1) only the objects within the camera's view display, 2) reflections are properly added, and 3) images behind other images are shown/hidden based on the camera's view. The output is then merged and the final image displayed. The last stage of the rendering pipeline finalizes what pixels will display based on the pixels closest to the camera and other variables mentioned. The 3D scene below, from the Stealth game, shows a game scene that has not yet gone through the rendering pipeline.

When we run the game (so that the vertices are transformed into a 2D image), notice we only see the game objects closest to the camera. And, based on the camera's view objects behind some of the partitions are hidden. As the player moves the view shifts and more processing occurs to render the images that are now within the camera's view.

Developers who specialize in 3D and animation can program some of the stages associated with the rendering pipeline by creating programs called shaders. Shaders execute inside the graphics processing unit (GPU) and define how the data is processed to, ultimately, display the final image. The ability to create shaders means developers can now create custom effects that were not possible when the rendering pipeline only included pre-programmed stages.
The OpenGL ES is a cross-platform API used to create and compile shaders and execute other related operations including the ability to define buffers that the shaders write to.
In addition to the OpenGL ES specification the OpenGL Shading Language specification is necessary to understand the different data types that can be used including vectors, matrices, opaque types, samplers (which are handlers to textures), cube maps, depth textures for shadows, etc. It also defines the statements and structures, variables (including constants) and more. The OpenGL Shading Language support progamming the following shaders: vertex shader, tessellation control shader, tessellation evaluation shader, geometry shader, fragment shader (sometimes called the pixel shader), and compute shader.
Each shader type is directly linked to a processor. For example, Vertex shaders run on the vertex processor. The vertex shader is used to read the coordinates of the vertices, transform them to 2D screen coordinates as well as process other attributes of each vertex such as color, normals, etc.
The fragment shaders (also referred to as pixel shader) receives pixel data, calculates the final color of the pixel and passes it to the next stage so the final output can be produced. The pixel shader can change the depth of the pixel to define what pixels should or should not be drawn. By default, the depth defines the distance between the originating triangle and the camera. But, the developer can manipulate the distance by specifying a value that will be used when the final image is created.
(You can read a more general overview of Shaders by reading my previous article Unity Game Engine's Mesh Renderer, Mesh Filter, Shaders and Materials Overview.)
Android includes support for 2D and 3D graphics using the OpenGL ES API. Android supports several versions of OpenGL ES as follows:
Before you start developing your 3D app or game you will want to download and install the Android Developer Tools (ADT) Bundle and access the Android SDK Manager to download the applicable Android SDK platform, etc. For more information, please see my previous article titled: Programming Mobile Apps for Android With Eclipse.
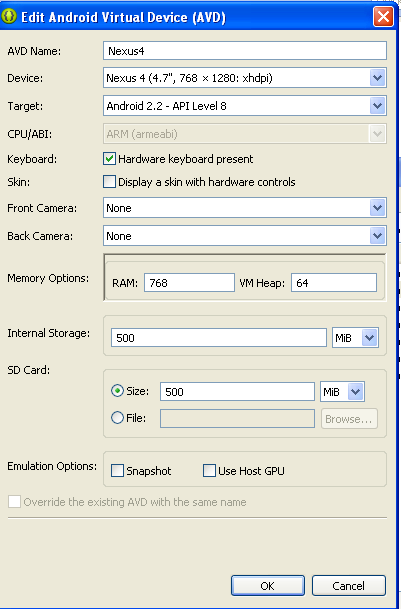
Note: When you create an emulator, as outlined in my previous article, make sure you check the option to enable the GPU on the host. As mentioned, OpenGL ES apps require access to a GPU.

When you create an Android app that supports OpenGL ES, you must add a declaration to the AndroidManifest.xml file. The uses-feature statement to be added includes the glEsVersion attribute, which provides a way for developers to define the OpenGL ES version required to run the application. For example, if OpenGL ES version 1.0 is required; the glEsVersion attribute is set as 0x00010000. If an application requires OpenGL ES 2.0 and OpenGL ES 3.0; the value of the attribute is set to 0x00030000. It is then understood that the application supports not only OpenGL ES 3.0; but also all lower versions. Here is what the uses-feature statement looks like (in this example the application requires OpenGL ES 2.0): <uses-feature android:glEsVersion="0x00020000" android:required="true" />
The uses-feature statement takes two other values besides glEsVersion as follows: android:name and android:required. Android:name defines a valid value from the hardware or software list at the bottom of the Uses-Feature API Page. The android:required value defines whether the feature is "required" to run the app. True means the feature is required; false means use the feature if it is available on the device.
The classes that make up the android application project is defined by the graphics and their behavior. Take a look at the simple Hello OpenGL ES projects, which can be downloaded from http://developer.android.com/training/graphics/opengl/environment.html.
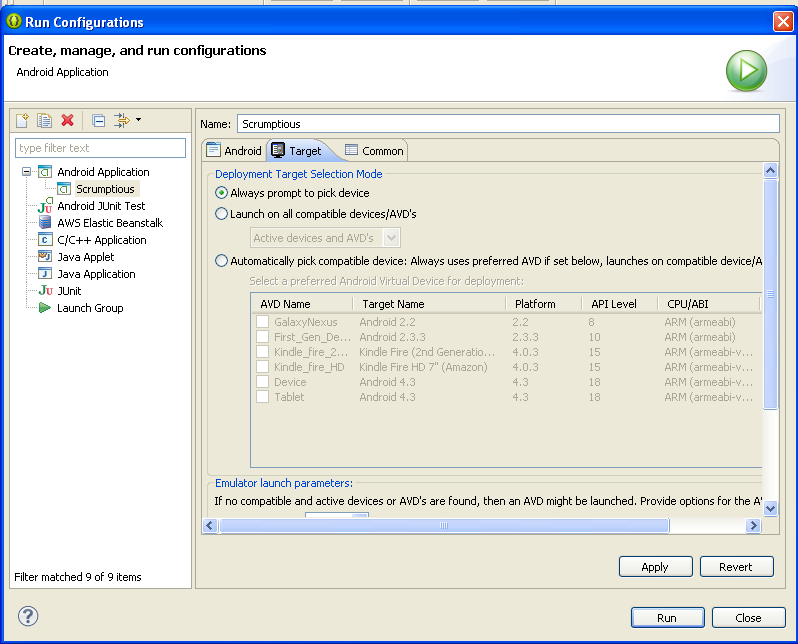
Note: Once you download the project, you can use the Import option, available from the File menu in Eclipse. You can then use the "Existing Android Code Into Workspace" option to import the project and then run it as an Android Application. Remember you cannot run the project without an emulator that has GPU support and the android version that corresponds to the required OpenGL ES version, as discussed in Android and the OpenGL ES section above.

The download includes two android application projects. One requires OpenGL ES version 1.0 the other requires version 2.0. When you run the application it displays a triangle and a square. You can click and rotate the triangle because it was programmed to respond to user interaction.

The Hello OpenGL ES project's core classes are as follows:
MyGLRenderer implements the GLSurfaceView.Renderer class, which is used to render a frame. In the Hello OpenGL ES project the GLSurfaceView.Render uses GLES20 constants to draw the background color of the frame. It uses the Matrix class to set the camera position as well as calculate and store 4 x 4 column-vectors for rendering. (Below is an example of the 4 x 4 column-vector matrices from the OpenGL ES Android reference:)
m[offset + 0] m[offset + 4] m[offset + 8] m[offset + 12]
m[offset + 1] m[offset + 5] m[offset + 9] m[offset + 13]
m[offset + 2] m[offset + 6] m[offset + 10] m[offset + 14]
m[offset + 3] m[offset + 7] m[offset + 11] m[offset + 15]
The Hello OpenGL ES project introduces quite a few interesting programming concepts. For example, the MyGLSurfaceView class implements the GLSurfaceView class, which creates a view container (which manages a surface so OpenGL can render to that surface) used to render OpenGL ES graphics as well as capture touch events so users can interact with the graphics. Th android activity class creates an instance of the GLSurfaceView to serve as the Content View for the activity.
In the project the MyGLSurfaceView calls the MyGLRenderer class so the graphics can be rendered using the GLSurfaceView.Renderer class. Both the Triangle and the Square class use the GLES20.glCreateProgram() command to create an empty OpenGL ES program. And the GLES20.glAttachShader command is used to add the vertex and fragment shaders to the program. The GLES20.glLinkProgram command (or public method) is then used to create the OpenGL program executables. The vertex shader executable runs on the vertex processor and the fragment shader executable runs on the fragment processor.
Since the user can interact with the triangle, the triangle coordinates are captured and used to write the position of the triangle. The MyGLRender class is implemented in a way that ensures, once the triangle is rendered, it is only rendered again when the data changes.
Overall the Hello OpenGL ES project has a very simple design that executes the key elements of an animated graphics android application. This program can help developers more easily understand how to program graphics using the OpenGL ES API as well as create shaders and assign buffers. For more information you can refer to the following list of resources:
This articles discusses the Open Graphics Library specification for Embedded Systems (OpenGL ES) used to define shaders and other elements to render 3D scenes. It also discusses the OpenGL Shading Language specification. And it provides an overview of a simple Android application that uses the OpenGL ES to render animated graphics on Android devices.
OpenGL ES and the OpenGL® Shading Language
For a 3D scene to display there are a series of steps executed through the rendering pipeline. These steps ensure 1) only the objects within the camera's view display, 2) reflections are properly added, and 3) images behind other images are shown/hidden based on the camera's view. The output is then merged and the final image displayed. The last stage of the rendering pipeline finalizes what pixels will display based on the pixels closest to the camera and other variables mentioned. The 3D scene below, from the Stealth game, shows a game scene that has not yet gone through the rendering pipeline.
When we run the game (so that the vertices are transformed into a 2D image), notice we only see the game objects closest to the camera. And, based on the camera's view objects behind some of the partitions are hidden. As the player moves the view shifts and more processing occurs to render the images that are now within the camera's view.
Developers who specialize in 3D and animation can program some of the stages associated with the rendering pipeline by creating programs called shaders. Shaders execute inside the graphics processing unit (GPU) and define how the data is processed to, ultimately, display the final image. The ability to create shaders means developers can now create custom effects that were not possible when the rendering pipeline only included pre-programmed stages.
The OpenGL ES is a cross-platform API used to create and compile shaders and execute other related operations including the ability to define buffers that the shaders write to.
OpenGL Shading Language
In addition to the OpenGL ES specification the OpenGL Shading Language specification is necessary to understand the different data types that can be used including vectors, matrices, opaque types, samplers (which are handlers to textures), cube maps, depth textures for shadows, etc. It also defines the statements and structures, variables (including constants) and more. The OpenGL Shading Language support progamming the following shaders: vertex shader, tessellation control shader, tessellation evaluation shader, geometry shader, fragment shader (sometimes called the pixel shader), and compute shader.
Vertex and Fragment Shaders
Each shader type is directly linked to a processor. For example, Vertex shaders run on the vertex processor. The vertex shader is used to read the coordinates of the vertices, transform them to 2D screen coordinates as well as process other attributes of each vertex such as color, normals, etc.
The fragment shaders (also referred to as pixel shader) receives pixel data, calculates the final color of the pixel and passes it to the next stage so the final output can be produced. The pixel shader can change the depth of the pixel to define what pixels should or should not be drawn. By default, the depth defines the distance between the originating triangle and the camera. But, the developer can manipulate the distance by specifying a value that will be used when the final image is created.
(You can read a more general overview of Shaders by reading my previous article Unity Game Engine's Mesh Renderer, Mesh Filter, Shaders and Materials Overview.)
Android and the OpenGL ES
Android includes support for 2D and 3D graphics using the OpenGL ES API. Android supports several versions of OpenGL ES as follows:
- OpenGL ES 1.0 and 1.1 is supported by Android 1.0.
- OpenGL ES 2.0 is supported by Android 2.2 (API level 8).
- OpenGL ES 3.0 is supported by Android 4.3 (API level 18).
Before you start developing your 3D app or game you will want to download and install the Android Developer Tools (ADT) Bundle and access the Android SDK Manager to download the applicable Android SDK platform, etc. For more information, please see my previous article titled: Programming Mobile Apps for Android With Eclipse.
Note: When you create an emulator, as outlined in my previous article, make sure you check the option to enable the GPU on the host. As mentioned, OpenGL ES apps require access to a GPU.
Displaying Graphics on Android with OpenGL ES
Android Manifest
When you create an Android app that supports OpenGL ES, you must add a declaration to the AndroidManifest.xml file. The uses-feature statement to be added includes the glEsVersion attribute, which provides a way for developers to define the OpenGL ES version required to run the application. For example, if OpenGL ES version 1.0 is required; the glEsVersion attribute is set as 0x00010000. If an application requires OpenGL ES 2.0 and OpenGL ES 3.0; the value of the attribute is set to 0x00030000. It is then understood that the application supports not only OpenGL ES 3.0; but also all lower versions. Here is what the uses-feature statement looks like (in this example the application requires OpenGL ES 2.0): <uses-feature android:glEsVersion="0x00020000" android:required="true" />
The uses-feature statement takes two other values besides glEsVersion as follows: android:name and android:required. Android:name defines a valid value from the hardware or software list at the bottom of the Uses-Feature API Page. The android:required value defines whether the feature is "required" to run the app. True means the feature is required; false means use the feature if it is available on the device.
The classes that make up the android application project is defined by the graphics and their behavior. Take a look at the simple Hello OpenGL ES projects, which can be downloaded from http://developer.android.com/training/graphics/opengl/environment.html.
Note: Once you download the project, you can use the Import option, available from the File menu in Eclipse. You can then use the "Existing Android Code Into Workspace" option to import the project and then run it as an Android Application. Remember you cannot run the project without an emulator that has GPU support and the android version that corresponds to the required OpenGL ES version, as discussed in Android and the OpenGL ES section above.
The download includes two android application projects. One requires OpenGL ES version 1.0 the other requires version 2.0. When you run the application it displays a triangle and a square. You can click and rotate the triangle because it was programmed to respond to user interaction.
Hello OpenGL ES Android Application Project Classes
The Hello OpenGL ES project's core classes are as follows:
- MyGLSurfaceView
- MyGLRenderer
- OpenGLES20Activity
- Square
- Triangle
MyGLRenderer implements the GLSurfaceView.Renderer class, which is used to render a frame. In the Hello OpenGL ES project the GLSurfaceView.Render uses GLES20 constants to draw the background color of the frame. It uses the Matrix class to set the camera position as well as calculate and store 4 x 4 column-vectors for rendering. (Below is an example of the 4 x 4 column-vector matrices from the OpenGL ES Android reference:)
m[offset + 0] m[offset + 4] m[offset + 8] m[offset + 12]
m[offset + 1] m[offset + 5] m[offset + 9] m[offset + 13]
m[offset + 2] m[offset + 6] m[offset + 10] m[offset + 14]
m[offset + 3] m[offset + 7] m[offset + 11] m[offset + 15]
In the project the MyGLSurfaceView calls the MyGLRenderer class so the graphics can be rendered using the GLSurfaceView.Renderer class. Both the Triangle and the Square class use the GLES20.glCreateProgram() command to create an empty OpenGL ES program. And the GLES20.glAttachShader command is used to add the vertex and fragment shaders to the program. The GLES20.glLinkProgram command (or public method) is then used to create the OpenGL program executables. The vertex shader executable runs on the vertex processor and the fragment shader executable runs on the fragment processor.
Since the user can interact with the triangle, the triangle coordinates are captured and used to write the position of the triangle. The MyGLRender class is implemented in a way that ensures, once the triangle is rendered, it is only rendered again when the data changes.
Summary
Overall the Hello OpenGL ES project has a very simple design that executes the key elements of an animated graphics android application. This program can help developers more easily understand how to program graphics using the OpenGL ES API as well as create shaders and assign buffers. For more information you can refer to the following list of resources:
- OpenGL ES Reference http://www.khronos.org/opengles/sdk/docs/man3/index.php
- OpenGL ES Specification http://www.khronos.org/registry/gles/specs/3.0/es_spec_3.0.3.pdf
- Building an OpenGL ES Environment Article: http://developer.android.com/training/graphics/opengl/environment.html
- Article on the Frame Buffer: http://www.opengl.org/wiki/Framebuffer
- Graphics Pipeline Documentation http://msdn.microsoft.com/en-us/library/windows/desktop/ff476882%28v=vs.85%29.aspx